For some of us, there comes a point in our lives when we look around our dwelling and realize the college student look has to go. Others of us look around and see an eclectic mix of sad and worn hand-me-down furniture. And a few of us are just, well, bored with the décor we have had for the last five years.
To redecorate your home, you don't need to spend a whole lot of cash. Granted, a major remodel, such as a kitchen or bathroom, will be a whole different story (and an article to come later this year). However, any space in your home can be given a fresh look with easy do-it-yourself projects at minimal cost.
Décor Ideas for Any Room:
Use What Ya Got - Many times we become so accustomed to seeing things in the same place we don't consider their potential in another area or room of the home. Rearranging furniture and décor can give any space a new look.
- Consider how you use the space first, do you find some rooms are used all the time and others hardly at all? Frequently used spaces can easily become cluttered. Perhaps there is something you can move to a less used space to bring new purpose to that area. Convert a scarcely used nook to a game table or move a small bookshelf and add a lamp next to that comfy chair no one ever seems to sit in. Think outside the "box" of your previous layout.
- Similar to the point above, consider some of your larger pieces of furniture. Moving a piece out of the room into another may help free up space in one and redefine another.
- What is the flow of your rooms? Do pathways from one doorway to the next make sense? Perhaps everyone seems to be ducking in front of the couch to get by the TV when there is room to move the couch away from the wall. Contrary to popular belief, the couch does not need to go against the wall!
- Take established pieces and reinvent them. No, the modular sofa does not have to be one formal island in the center of the room. Break it up and add lights, or end tables to help recharge the room.
- Besides furniture, consider what you have hanging on the wall as well. Do you have old paintings that no longer appeal to you or the space? Do you have new photos that you can't seem to find a place for? If you are rearranging furniture, take pictures off the wall first, you don't want to be boxed in with idea to leave wall space for this or that. Afterwards, look at the new blank walls and consider the possibilities. If you are not rearranging furniture, still take the pictures down. Leave them down for a couple days and come back to look at the room as fresh as possible - what do you really miss being up there, what would you like to add, or perhaps, do you prefer a more blank, uncluttered wall?
Color Me New - A splash of paint can go a long way! Repainting walls can be a lot of fun and the best part is that if you don't like it you can just paint over it! Of course today there are great programs at the do-it-yourself stores that help you customize colors and paint styles before you begin. And painting doesn't have to stop at the walls!
- Repainting the ceiling can help to brighten a room considerably.
- If you have old painted trim, you may want to consider splashing on a fresh coat of paint or changing the color altogether.
- Painting old furniture can reinvent it and is something kids can get involved with if redecorating their own room.
- There are paint sets out there to help repaint anything with a surface. You can give any end table, lamp or bookshelf a new antiqued look. For example, we had some white metal dining room chandeliers that clashed with our house, it was easy to dismantle them and paint them with a rusted look and this saved us buying chandeliers that would otherwise have cost $200 a piece! I admit, we did this with the thought that we would replace them "down the road," but since their makeover they have stopped being an eyesore and we have even received compliments on them - most didn't realize they were painted until we said something!
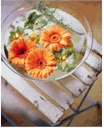
It's ALIVE! - Plants can do wonders for the home. Some believe that you should have a plant in every room. Large potted plants can help give life to blank corners or help set up the outline of a nice path throughout a room. Smaller potted plants can add color to the window or shelf. It must be admitted that although nice idea, not all of us have a green thumb and lack of light may doom some of our green friends from the beginning. Many of the silk plants these days look very real, however, they are not for everyone. Another alternative is fresh cut flowers. Get enough small vases and one bunch can be used throughout the home and greet you everywhere from the bedroom to the kitchen.
Instant Relatives - "Instant relatives" is a phrase my friend uses for the photos of people in the new frames you buy. If you bought a frame 6 months to a year ago and still have those "instant relatives" you don't know staring at you, then you have just found one of the easiest home décor projects! If you don’t have new frames, they are an inexpensive way to help any room. And remember, all the frames on one wall don't always have to match; sometimes the mix match look of your décor is what can give it personality! Once you have some frames you like, fill them with memories or art you enjoy having around you. Today it is easy to enlarge photographs and add effects to them. Enlarge one of your favorite photos of Scotland or collage your last family vacation. Fill the frames with photos of family, friends, vacation scenery, art prints, artwork by the kids, favorite postcards or cards, the list can be endless if you let your imagination run with it; make it fun!
Facelift Under $20 - Many times just adding a few small pieces can help a space. At many department stores you can find: candles, sconces, mirrors, frames, framed art, plaque art, photo holders, statues, ornate boxes, pillows, table runners, etc. Any of these smaller items can be combined to add a unique design to your space. Also, many department stores package themed art (southwest, modern, Victorian, African, etc.) to help you create the design for the space you want. These series often go on sale as one design set makes way for another, leaving you a chance to find some great decorations with a little planning and patience.
Oh Just Hang It! - The softness of fabric in a room can make a major mood change. Drapes are one of the easiest ways to change the look of a space. You can get drapes relatively cheap these days. I have both purchased and made my own drapes and consider it a draw. I was able to get better fabric quality when making my own, but the time and headache (I'm not a sewing expert) did cancel out some of the ease of just buying them. Others have been smarter than me and buy a fabric they want, simply seem the edges and then hang them freely over the curtain rods. Another consideration would be bamboo or roman blinds, some find these a more colorful and cheaper alternative to standard blinds.
Camouflage the Old - Covering up what you already have can be a great alternative to buying new furniture. Covers for sofas, tables and chairs can help you bring new colors and patterns into your room. Again, you can make these items yourself or purchase them in the store. Unless you a proficient with the sewing machine, it may be easier to purchase some of these items. Sometimes even cushions and pillows can help cover up worn spots or add color to a drab space. While we are covering things up, you may also consider to use rugs to cover up and change the pattern/color or old floors. Especially for older hard wood floors or pergo, this can be a great way to spiff up your room.
The Finer Details - Another detail that can be changed on a small scale but effect a room on a large scale is your hardware and fixtures. Changing the hardware on cabinets can reinvent your kitchen or bathroom. You can also replace fixtures such as light casings, towel holders, toiletry and soap holders, etc. Changing these items can help change the room from modern to antique or vice versa (just for example). Many department stores sell fixture sets that can be a quick and easy facelift to any bathroom.
Just Say No to Clutter - Finally, one of the most effective ways to redecorate your home is to get rid of clutter. This doesn't just mean picking up bits of paper. This can also mean getting items to help you organize. Many stores offer beautiful baskets, tins or other containers that can be used to organize your madness. Adding a bit of shelving, a chest, a large basket or an ottoman that opens up for storage are just a few ways you can change the look of the room and give yourself storage space. Changing a room from cluttered to organized can have a dramatic effect on the décor and overall feel of the space.
Conclusion
Redecorating your home on a low budget can include inventive use of what you already have to inexpensive updates to your room such as paints or wall hangings. Obviously we have only touched a few methods here. Hopefully this list helps you think outside the box and consider other ways you may utilize the spaces in your home. Still want to see more? Check out a few of our suggested links on the right. Happy decorating!
Further Reading
About.com
If you long for a beautiful home, you have come to the right place! Learn about home decorating, get tips for projects, find directions for how-to's, and advice from About Guide to Interior Decorating, Coral Nafie. Take a look!
Behr.com
Get interior design ideas from dozens of articles and hundreds of images.
BHG.com
Join us for truly inspiring decorating ideas, easy projects, step-by-step how-tos, practical home improvement tips, remodeling ideas, and home plans -- from Better Homes and Gardens family of magazines.
CountryLiving.com
Home decorating ideas, craft projects, home accents, renovation tips and more country style from Country Living magazine.
Do-It-Yourself.com
Decorating and painting is a key ingredient to a beautiful home. Before you begin decorating or re-decorating your home, learn more about painting techniques and preparation, selecting paint colors and finishes, decorating and designing trends, and interior décor, accents and furnishings. Home decorating has never been easier!
HGTV.com
Learn more about decorating and interior design ideas, projects and how-to from videos on Home & Garden Television.
KatieBrownHomeWorkshop.com
This is the official website for Katie Brown and the Katie Brown Workshop. It is the place to shop and buy Katie Brown books and provides information regarding lifestyle and domestic guru, Katie Brown and answers any questions you have about Katie Brown’s books, products, columns, Podcasts, or her televisions shows including the Katie Brown Workshop on Public Television.
MarthaStewart.com
Different ideas from her show and magazines.
RealSimple.com
Magazine and TV show about simplifying your life. Includes home solutions, meals, special features.